Tutorial: Intro To React
What We're Building #
Today, we're going to build an interactive tic-tac-toe game. We'll assume some familiarity with HTML and JavaScript but you should be able to follow along even if you haven't used them before.
If you like, you can check out the final result here: Final Result. Try playing the game. You can also click on a link in the move list to go "back in time" and see what the board looked like just after that move was made.
What is React? #
React is a declarative, efficient, and flexible JavaScript library for building user interfaces.
React has a few different kinds of components, but we'll start with React.Component subclasses:
class ShoppingList extends React.Component {
  render() {
    return (
      <div className="shopping-list">
        <h1>Shopping List for {this.props.name}</h1>
        <ul>
          <li>Instagram</li>
          <li>WhatsApp</li>
          <li>Oculus</li>
        </ul>
      </div>
    );
  }
}

// Example usage: <ShoppingList name="Mark" />
We'll get to the funny XML-like tags in a second. Your components tell React what you want to render – then React will efficiently update and render just the right components when your data changes.
Here, ShoppingList is a React component class, or React component type. A component takes in parameters, called props, and returns a hierarchy of views to display via the render method.
The render method returns a description of what you want to render, and then React takes that description and renders it to the screen. In particular, render returns a React element, which is a lightweight description of what to render. Most React developers use a special syntax called JSX which makes it easier to write these structures. The <div /> syntax is transformed at build time to React.createElement('div'). The example above is equivalent to:
return React.createElement('div', {className: 'shopping-list'},
  React.createElement('h1', ...),
  React.createElement('ul', ...)
);
You can put any JavaScript expression within braces inside JSX. Each React element is a real JavaScript object that you can store in a variable or pass around your program.
The ShoppingList component only renders built-in DOM components, but you can compose custom React components just as easily, by writing <ShoppingList />. Each component is encapsulated so it can operate independently, which allows you to build complex UIs out of simple components.
Getting Started #
Start with this example: Starter Code.
It contains the shell of what we're building today. We've provided the styles so you only need to worry about the JavaScript.
In particular, we have three components:
- Square
- Board
- Game
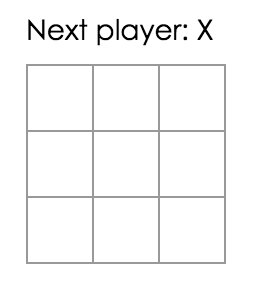
The Square component renders a single <div>, the Board renders 9 squares, and the Game component renders a board with some placeholders that we'll fill in later. None of the components are interactive at this point.
(The end of the JS file also defines a helper function calculateWinner that we'll use later.)
Passing Data Through Props #
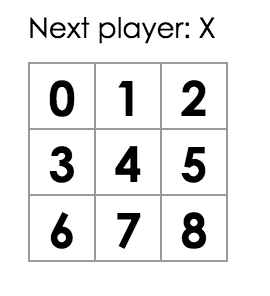
Just to get our feet wet, let's try passing some data from the Board component to the Square component. In Board's renderSquare method, change the code to return <Square value={i} /> then change Square's render method to show that value by replacing {/* TODO */} with {this.props.value}.
Before:
After: You should see a number in each square in the rendered output.
An Interactive Component #
Let's make the Square component fill in an "X" when you click it. Try changing the opening tag returned in the render() function of the Square class to:
<button className="square" onClick={() => alert('click')}>
This uses the new JavaScript arrow function syntax. If you click on a square now, you should get an alert in your browser.
React components can have state by setting this.state in the constructor, which should be considered private to the component. Let's store the current value of the square in state, and change it when the square is clicked. First, add a constructor to the class to initialize the state:
class Square extends React.Component {
  constructor() {
    super();
    this.state = {
      value: null,
    };
  }
  ...
}
In JavaScript classes, you need to explicitly call super(); when defining the constructor of a subclass.
Now change the render method to display this.state.value instead of this.props.value, and change the event handler to be () => this.setState({value: 'X'}) instead of the alert:
<button className="square" onClick={() => this.setState({value: 'X'})}>
    {this.state.value}
</button>
Whenever this.setState is called, an update to the component is scheduled, causing React to merge in the passed state update and rerender the component along with its descendants. When the component rerenders, this.state.value will be 'X' so you'll see an X in the grid.
If you click on any square, an X should show up in it.
Developer Tools #
The React Devtools extension for Chrome and Firefox lets you inspect a React component tree in your browser devtools.
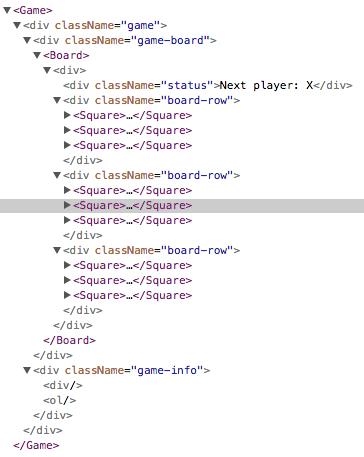
It lets you inspect the props and state of any of the components in your tree.
It doesn't work great on CodePen because of the multiple frames, but if you log in to CodePen and confirm your email (for spam prevention), you can go to Change View > Debug to open your code in a new tab, then the devtools will work. It's fine if you don't want to do this now, but it's good to know that it exists.
Lifting State Up #
We now have the basic building blocks for a tic-tac-toe game. But right now, the state is encapsulated in each Square component. To make a fully-working game, we now need to check if one player has won the game, and alternate placing X and O in the squares. To check if someone has won, we'll need to have the value of all 9 squares in one place, rather than split up across the Square components.
You might think that Board should just inquire what the current state of each Square is. Although it is technically possible to do this in React, it is discouraged because it tends to make code difficult to understand, more brittle, and harder to refactor.
Instead, the best solution here is to store this state in the Board component instead of in each Square – and the Board component can tell each Square what to display, like how we made each square display its index earlier.
When you want to aggregate data from multiple children or to have two child components communicate with each other, move the state upwards so that it lives in the parent component. The parent can then pass the state back down to the children via props, so that the child components are always in sync with each other and with the parent.
Pulling state upwards like this is common when refactoring React components, so let's take this opportunity to try it out. Add an initial state for Board containing an array with 9 nulls, corresponding to the 9 squares:
class Board extends React.Component {
  constructor() {
    super();
    this.state = {
      squares: Array(9).fill(null),
    };
  }
}
We'll fill it in later so that a board looks something like
[
  'O', null, 'X',
  'X', 'X', 'O',
  'O', null, null,
]
Pass the value of each square down:
renderSquare(i) {
  return <Square value={this.state.squares[i]} />;
}
And change Square to use this.props.value again. Now we need to change what happens when a square is clicked. The Board component now stores which squares are filled, which means we need some way for Square to update the state of Board. Since component state is considered private, we can't update Board's state directly from Square. The usual pattern here is pass down a function from Board to Square that gets called when the square is clicked. Change renderSquare again so that it reads:
return <Square value={this.state.squares[i]} onClick={() => this.handleClick(i)} />;
Now we're passing down two props from Board to Square: value and onClick. The latter is a function that Square can call. So let's do that by changing render in Square to have:
<button className="square" onClick={() => this.props.onClick()}>
  {this.props.value}
</button>
This means that when the square is clicked, it calls the onClick function that was passed by the parent. The onClick doesn't have any special meaning here, but it's popular to name handler props starting with on and their implementations with handle. Try clicking a square – you should get an error because we haven't defined handleClick yet. Add it to the Board class:
handleClick(i) {
  const squares = this.state.squares.slice();
  squares[i] = 'X';
  this.setState({squares: squares});
}
We call .slice() to copy the squares array instead of mutating the existing array. Jump ahead a section to learn why immutability is important.
Now you should be able to click in squares to fill them again, but the state is stored in the Board component instead of in each Square, which lets us continue building the game. Note how whenever Board's state changes, the Square components rerender automatically.
Square no longer keeps its own state; it receives its value from its parent Board and informs its parent when it's clicked. We call components like this controlled components.
Why Immutability Is Important #
In the previous code example, we suggest using the .slice() operator to copy the squares array prior to making changes and to prevent mutating the existing array. Let's talk about what this means and why it is an important concept to learn.
There are generally two ways for changing data. The first method is to mutate the data by directly changing the values of a variable. The second method is to replace the data with a new copy of the object that also includes desired changes.
Data change with mutation #
var player = {score: 1, name: 'Jeff'};
player.score = 2;
// Now player is {score: 2, name: 'Jeff'}
Data change without mutation #
var player = {score: 1, name: 'Jeff'};

var newPlayer = Object.assign({}, player, {score: 2});
// Now player is unchanged, but newPlayer is {score: 2, name: 'Jeff'}

// Or if you are using object spread, you can write:
// var newPlayer = {...player, score: 2};
The end result is the same but by not mutating (or changing the underlying data) directly we now have an added benefit that can help us increase component and overall application performance.
Tracking Changes #
Determining if a mutated object has changed is complex because changes are made directly to the object. This then requires comparing the current object to a previous copy, traversing the entire object tree, and comparing each variable and value. This process can become increasingly complex.
Determining how an immutable object has changed is considerably easier. If the object being referenced is different from before, then the object has changed. That's it.
Determining When To Re-render in React #
The biggest benefit of immutability in React comes when you build simple pure components. Since immutable data can more easily determine if changes have been made it also helps to determine when a component requires being re-rendered.
To learn how you can build pure components take a look at shouldComponentUpdate(). Also, take a look at the Immutable.js library to strictly enforce immutable data.
Functional Components #
Back to our project, you can now delete the constructor from Square; we won't need it any more. In fact, React supports a simpler syntax called stateless functional components for component types like Square that only consist of a render method. Rather than define a class extending React.Component, simply write a function that takes props and returns what should be rendered:
function Square(props) {
  return (
    <button className="square" onClick={() => props.onClick()}>
      {props.value}
    </button>
  );
}
You'll need to change this.props to props both times it appears. Many components in your apps will be able to be written as functional components: these components tend to be easier to write and React will optimize them more in the future.
Taking Turns #
An obvious defect in our game is that only X can play. Let's fix that.
Let's default the first move to be by 'X'. Modify our starting state in our Board constructor.
class Board extends React.Component {
  constructor() {
    super();
    this.state = {
      ...
      xIsNext: true,
    };
  }
Each time we move we shall toggle xIsNext by flipping the boolean value and saving the state. Now update our handleClick function to flip the value of xIsNext.
handleClick(i) {
  const squares = this.state.squares.slice();
  squares[i] = this.state.xIsNext ? 'X' : 'O';
  this.setState({
    squares: squares,
    xIsNext: !this.state.xIsNext,
  });
}
Now X and O take turns. Next, change the "status" text in Board's render so that it also displays who is next.
render() {
  const status = 'Next player: ' + (this.state.xIsNext ? 'X' : 'O');
  ...
Declaring a Winner #
Let's show when the game is won. A calculateWinner(squares) helper function that takes the list of 9 values has been provided for you at the bottom of the file. You can call it in Board's render function to check if anyone has won the game and make the status text show "Winner: [X/O]" when someone wins:
render() {
  const winner = calculateWinner(this.state.squares);
  let status;
  if (winner) {
    status = 'Winner: ' + winner;
  } else {
    status = 'Next player: ' + (this.state.xIsNext ? 'X' : 'O');
  }
  ...
}
You can now change handleClick to return early and ignore the click if someone has already won the game or if a square is already filled:
handleClick(i) {
  const squares = this.state.squares.slice();
  if (calculateWinner(squares) || squares[i]) {
    return;
  }
  ...
}
Congratulations! You now have a working tic-tac-toe game. And now you know the basics of React. So you're probably the real winner here.
Storing a History #
Let's make it possible to revisit old states of the board so we can see what it looked like after any of the previous moves. We're already creating a new squares array each time a move is made, which means we can easily store the past board states simultaneously.
Let's plan to store an object like this in state:
history = [
  {
    squares: [null x 9]
  },
  {
    squares: [... x 9]
  },
  ...
]
We'll want the top-level Game component to be responsible for displaying the list of moves. So just as we pulled the state up before from Square into Board, let's now pull it up again from Board into Game – so that we have all the information we need at the top level.
First, set up the initial state for Game:
class Game extends React.Component {
  constructor() {
    super();
    this.state = {
      history: [{
        squares: Array(9).fill(null)
      }],
      xIsNext: true
    };
  }
  ...
}
Then remove the constructor from Board and change Board so that it takes squares via props and has its own onClick prop specified by Game, like the transformation we made for Square earlier. You can pass the location of each square into the click handler so that we still know which square was clicked:
return <Square value={this.props.squares[i]} onClick={() => this.props.onClick(i)} />;
Game's render should look at the most recent history entry and can take over calculating the game status:
const history = this.state.history;
const current = history[history.length - 1];
const winner = calculateWinner(current.squares);

let status;
if (winner) {
  status = 'Winner: ' + winner;
} else {
  status = 'Next player: ' + (this.state.xIsNext ? 'X' : 'O');
}
...
<div className="game-board">
  <Board
    squares={current.squares}
    onClick={(i) => this.handleClick(i)}
  />
</div>
<div className="game-info">
  <div>{status}</div>
  <ol>{/* TODO */}</ol>
</div>
Since Game is now rendering the status, we can delete <div className="status">{status}</div> from the Board's render function.
Game's handleClick can push a new entry onto the stack by concatenating the new history entry to make a new history array:
handleClick(i) {
  const history = this.state.history;
  const current = history[history.length - 1];
  const squares = current.squares.slice();
  if (calculateWinner(squares) || squares[i]) {
    return;
  }
  squares[i] = this.state.xIsNext ? 'X' : 'O';
  this.setState({
    history: history.concat([{
      squares: squares
    }]),
    xIsNext: !this.state.xIsNext,
  });
}
At this point, Board only needs renderSquare and render; the state initialization and click handler should both live in Game.
Showing the Moves #
Let's show the previous moves made in the game so far. We learned earlier that React elements are first-class JS objects and we can store them or pass them around. To render multiple items in React, we pass an array of React elements. The most common way to build that array is to map over your array of data. Let's do that in the render method of Game:
const moves = history.map((step, move) => {
  const desc = move ?
    'Move #' + move :
    'Game start';
  return (
    <li>
      <a href="#" onClick={() => this.jumpTo(move)}>{desc}</a>
    </li>
  );
});
...
<ol>{moves}</ol>
For each step in the history, we create a list item <li> with a link <a> inside it that goes nowhere (href="#") but has a click handler which we'll implement shortly. With this code, you should see a list of the moves that have been made in the game, along with a warning that says
Warning: Each child in an array or iterator should have a unique "key" prop. Check the render method of "Game".
Let's talk about what that warning means.
Keys #
When you render a list of items, React always stores some info about each item in the list. If you render a component that has state, that state needs to be stored – and regardless of how you implement your components, React stores a reference to the backing native views.
When you update that list, React needs to determine what has changed. You could've added, removed, rearranged, or updated items in the list.
Imagine transitioning from
<li>Alexa: 7 tasks left</li>
<li>Ben: 5 tasks left</li>
to
<li>Ben: 9 tasks left</li>
<li>Claudia: 8 tasks left</li>
<li>Alexa: 5 tasks left</li>
To a human eye, it looks likely that Alexa and Ben swapped places and Claudia was added – but React is just a computer program and doesn't know what you intended it to do. As a result, React asks you to specify a key property on each element in a list, a string to differentiate each component from its siblings. In this case, alexa, ben, claudia might be sensible keys; if the items correspond to objects in a database, the database ID is usually a good choice:
<li key={user.id}>{user.name}: {user.taskCount} tasks left</li>
key is a special property that's reserved by React (along with ref, a more advanced feature). When an element is created, React pulls off the key property and stores the key directly on the returned element. Even though it may look like it is part of props, it cannot be referenced with this.props.key. React uses the key automatically while deciding which children to update; there is no way for a component to inquire about its own key.
When a list is rerendered, React takes each element in the new version and looks for one with a matching key in the previous list. When a key is added to the set, a component is created; when a key is removed, a component is destroyed. Keys tell React about the identity of each component, so that it can maintain the state across rerenders. If you change the key of a component, it will be completely destroyed and recreated with a new state.
It's strongly recommended that you assign proper keys whenever you build dynamic lists. If you don't have an appropriate key handy, you may want to consider restructuring your data so that you do.
If you don't specify any key, React will warn you and fall back to using the array index as a key – which is not the correct choice if you ever reorder elements in the list or add/remove items anywhere but the bottom of the list. Explicitly passing key={i} silences the warning but has the same problem so isn't recommended in most cases.
Component keys don't need to be globally unique, only unique relative to the immediate siblings.
Implementing Time Travel #
For our move list, we already have a unique ID for each step: the number of the move when it happened. Add the key as <li key={move}> and the key warning should disappear.
Clicking any of the move links throws an error because jumpTo is undefined. Let's add a new key to Game's state to indicate which step we're currently viewing. First, add stepNumber: 0 to the initial state, then have jumpTo update that state.
We also want to update xIsNext. We set xIsNext to true if the index of the move number is an even number.
jumpTo(step) {
  this.setState({
    stepNumber: step,
    xIsNext: (step % 2) ? false : true,
  });
}
Then update stepNumber when a new move is made by adding stepNumber: history.length to the state update in handleClick. Now you can modify render to read from that step in the history:
const current = history[this.state.stepNumber];
If you click any move link now, the board should immediately update to show what the game looked like at that time. You may also want to update handleClick to be aware of stepNumber when reading the current board state so that you can go back in time then click in the board to create a new entry. (Hint: It's easiest to .slice() off the extra elements from history at the very top of handleClick.)
Wrapping Up #
Now, you've made a tic-tac-toe game that:
- lets you play tic-tac-toe,
- indicates when one player has won the game,
- stores the history of moves during the game,
- allows players to jump back in time to see older versions of the game board.
Nice work! We hope you now feel like you have a decent grasp on how React works.
If you have extra time or want to practice your new skills, here are some ideas for improvements you could make, listed in order of increasing difficulty:
- Display the move locations in the format "(1, 3)" instead of "6".
- Bold the currently-selected item in the move list.
- Rewrite Board to use two loops to make the squares instead of hardcoding them.
- Add a toggle button that lets you sort the moves in either ascending or descending order.
- When someone wins, highlight the three squares that caused the win.